Installation Overview

Follow these steps to correctly install the **50mm cooling fan** onto the heatsink of your **Intel 10Gb network adapter**:
Installation Instructions for the 50mm Fan
Identify the Fan Orientation
- The **side with the manufacturer’s sticker** is typically the **intake side** (pulls air in).
- The **opposite side (without labels)** is the **exhaust side** (pushes air out).
- Since the fan should **pull air away from the heatsink**, the **label side should face away** from the heatsink, with the **non-labeled side facing the heatsink**.
Position the Fan on the Heatsink
- Place the **50mm fan** directly onto the heatsink, aligning it with the mounting holes.
Secure the Fan with Screws
- Use the **two supplied screws** to fasten the fan securely onto the heatsink.
- Tighten the screws **firmly but not excessively** to prevent damage.
Connect the Fan to Power
- Attach the **fan’s three-wire cable** (**red, yellow, and black**) to a suitable **power source**, such as a **motherboard fan header** or a **dedicated fan controller**, depending on your setup.
Verify Installation & Airflow
- Power on your system and **confirm that the fan is pulling air away from the heatsink**.
- If airflow direction is incorrect, **flip the fan** so the labeled side faces the heatsink.
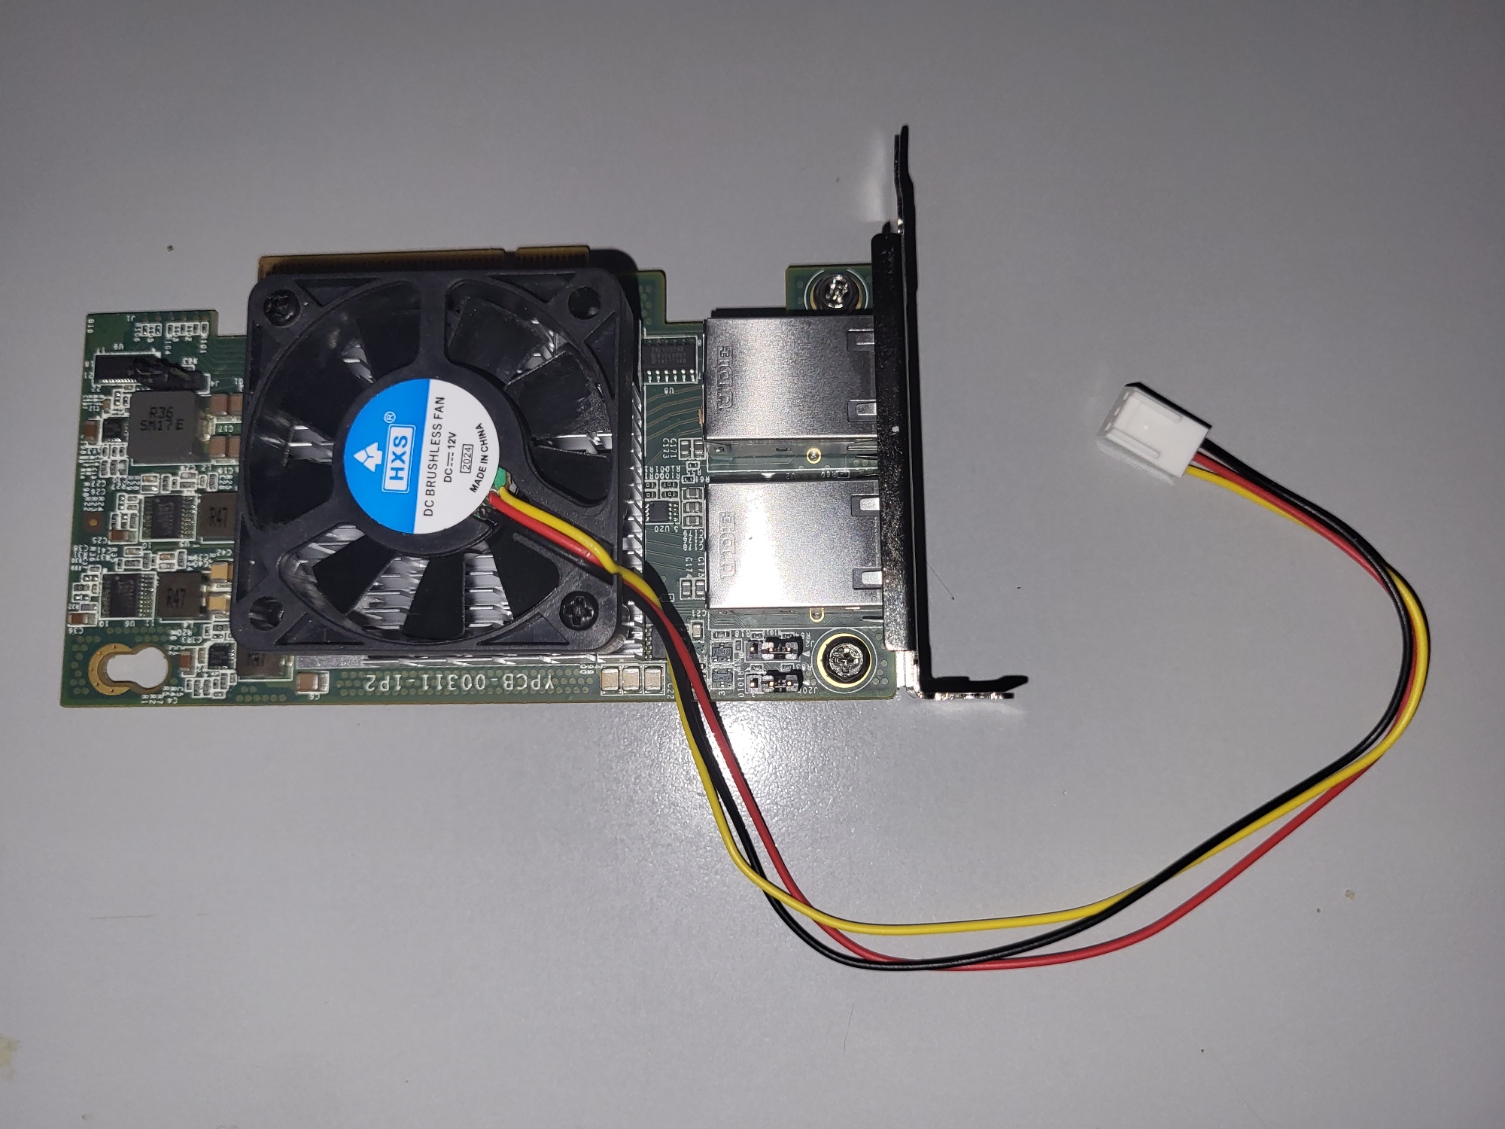
Reference Image
Buyers can refer to the included image for a **visual example** of how the fan should be installed on the network adapter. The image clearly shows:
- The **fan mounted on top of the heatsink**.
- The **positioning of the three-wire cable connection**.
- The **correct orientation of the fan**.
Need Help?
If you have any issues or need further assistance, visit our support center.
🔙 Back to X540 Support Page
📞 Support Center


